Fix Cracked Grout: Clean, Repair, and Re-Grout a Small Area
Cracked grout in a shower corner or along a kitchen backsplash looks alarming out of proportion to what it usually is. Your mind goes straight to water damage and a contractor’s estimate, but in most homes a cracked grout line in one small area is a normal, fixable bit of wear — grout is hard and brittle by nature, houses move almost imperceptibly with the seasons, and eventually a line gives up and splits. Re-grouting a small patch is one of the most satisfying repairs a beginner can do: quiet, inexpensive, no loud tools for most of it, and the before-and-after is dramatic.
Before you touch anything, though, this guide teaches the one rule that explains most cracked grout in the first place — because if your crack is in a corner, the correct repair is not grout at all, and re-doing it the wrong way just schedules the same crack for next year.
The rule first: grout vs. caulk
Here it is, the mistake behind most recurring grout cracks:
Flat surfaces get grout. Changes of plane get caulk.
Where two flat surfaces meet at an angle — the corner where a shower wall meets the floor, where a tub meets the tile wall, where two walls meet in a corner, where a backsplash meets the counter — the two sides move slightly and independently. Grout cannot flex, so grout in a corner cracks, reliably, every time. Those joints belong to a flexible flexible waterproof caulk for tile corners, which stretches instead of splitting.
So look at your crack first:
- Crack running along a corner or against the tub? Skip the re-grouting below. Remove the failed material, and refill the joint with caulk instead. That is the permanent fix, and discovering this is worth the whole guide.
- Crack in the middle of a flat tiled area? That is a true grout repair — proceed below. This guide covers a small area: a few tiles’ worth, not a whole floor.
Tools & materials
- A grout saw (a small hand tool with a gritty blade) or an oscillating multi-tool with a grout blade, if you have one
- Safety glasses — removing grout throws grit, no exceptions
- A utility knife, a stiff brush, and a vacuum with a hose attachment
- Painter’s tape to protect the tile edges
- Powdered grout — sanded or unsanded; see step 3 for which
- A small bucket, a margin trowel or old putty knife for mixing, and clean water
- A rubber grout float
- A large tile sponge and two buckets of clean water for cleanup
- Grout sealer for the final step, once the new grout has cured
Step by step: re-grouting a small flat area
- Remove the damaged grout. Work only on the cracked and crumbling lines — sound grout stays. Draw a manual grout removal saw along the joint with steady, even strokes, keeping the blade in the middle of the line and away from the tile edges, which chip if you bully them. An oscillating tool is faster but less forgiving, so go slowly and let the blade do the work. Clear out at least two-thirds of the grout depth so the new grout has real room to grip. Grout that is merely stained but solid does not need this — clean it instead.
- Clean the joint completely. Brush out the loose crumbs, then vacuum the lines thoroughly — new grout over dust and grit is grout that will let go early. Wipe the joint with a slightly damp cloth and let it dry. If the surrounding old grout is grimy, this is also the moment to scrub the whole area so your new line does not frame the dirt.
- Choose and mix the right grout. Use sanded grout for joints wider than about 1/8 inch (the sand adds strength), unsanded for narrower lines and for delicate tile that sand could scratch. Matching the existing color matters more than matching the bag name — take a crumb of the old grout to compare. Mix a powdered tile grout, adding water a little at a time, to the consistency of peanut butter: it should hold its shape on the trowel without slumping. Let it rest about ten minutes (slaking), then stir once more. Mix only what you can use in half an hour — for a small patch, a surprisingly modest amount.
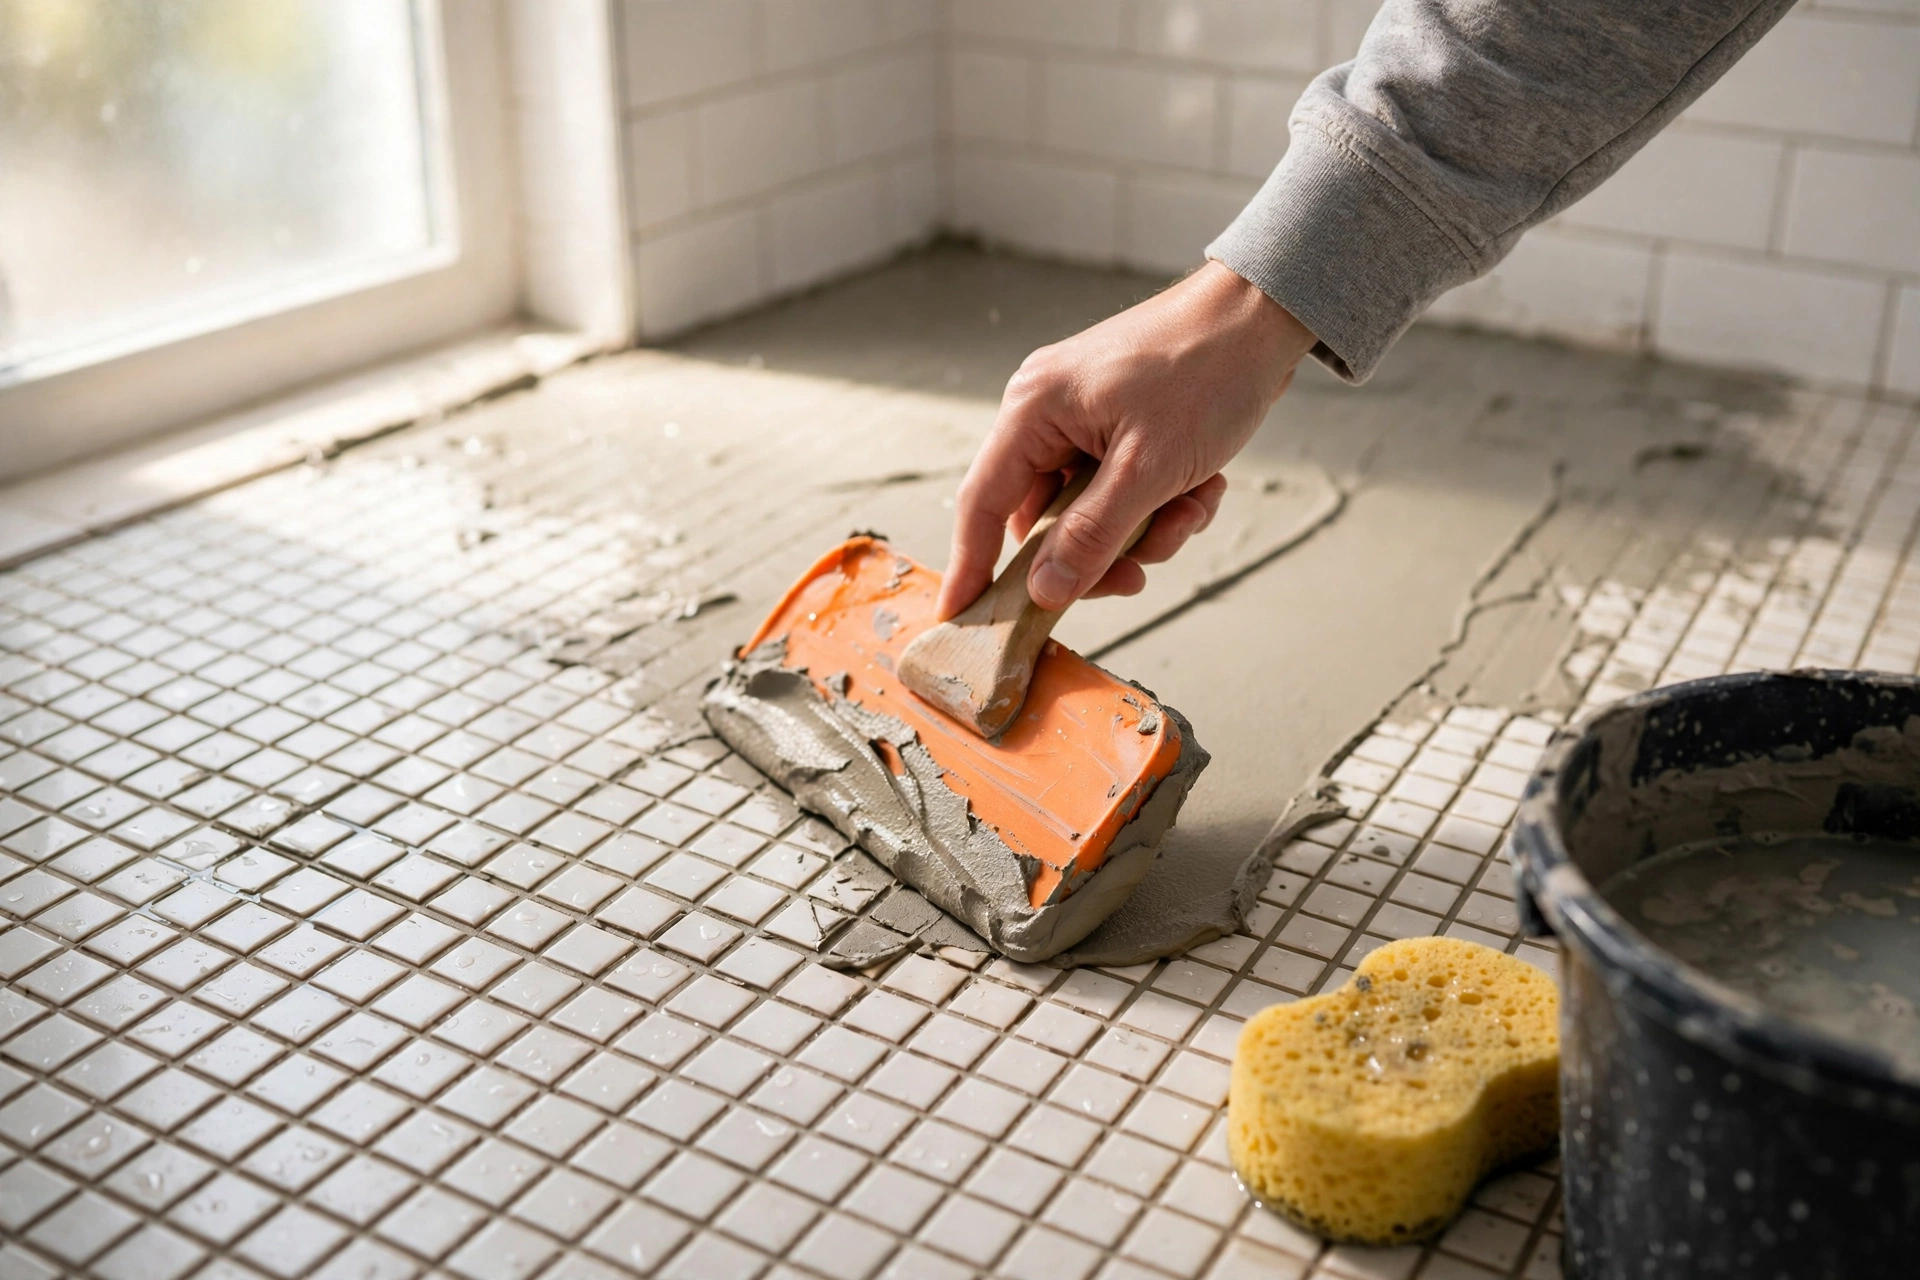
- Apply with the float. Tape the tile edges if you want extra protection. Load the rubber grout float and press grout into the joints at a 45-degree angle, pushing firmly so the lines fill completely with no air pockets — packing the joint fully is what gives the repair its strength. Work diagonally across the lines, then hold the float almost upright and scrape off the excess, moving diagonally again so you do not drag grout back out of the joints.
- Wait, then wipe the haze — on schedule. This timing is the step beginners miss. Let the grout firm up until it resists a fingertip pressed lightly — usually fifteen to thirty minutes, per the bag — then wipe the tile faces with a wrung-out, barely damp sponge, rinsing it constantly in clean water. Too early and you pull grout out of the joints; too late and the haze sets like cement. A thin haze will still appear as it dries; buff it off with a dry soft cloth a couple of hours later and it comes away easily — if you catch it that same day.
- Cure, then seal. Leave the repair alone for at least 24–48 hours (longer if the bag says so) before the area gets wet. Then apply grout sealer along the new lines to protect them from water and staining, wiping any excess off the tile faces. Sealing is the unglamorous step that doubles the life of the repair.
Common mistakes
- Grouting a corner. See the rule. It will crack again, and it is not your technique — it is the material in the wrong job. Corners get caulk.
- Smearing new grout over old cracked grout. A thin skim coat over a failed line has nothing to hold onto and flakes out within months. Removal to depth is not optional.
- Mixing grout too wet. Soup mixes easily, applies easily, and cures weak and prone to cracking. Peanut butter, not pancake batter.
- Wiping too soon or too wet. A dripping sponge floods the joints and weakens them; patience and a well-wrung sponge win.
- Skipping the cure before sealing or showering. Rushing the last day undoes the whole afternoon.
How long it takes and how hard it is
For a small area — say a cracked line across a few tiles — expect about an hour of active work: twenty minutes removing, ten cleaning, twenty grouting and wiping, plus the sealer step a day or two later, which takes ten minutes. Difficulty is beginner-friendly; the only real demand is patience with timing. The job is quiet, cheap, and confined to a drop cloth’s worth of mess. If you can ice a cake neatly, you can float grout.
When to call a pro
Call a tile professional if tiles themselves are cracked, loose, or sound hollow over a wide area when tapped; if grout is cracking in long lines across a whole floor rather than one spot; if you see mold that returns quickly, soft or swollen material behind the tile, or water staining on a ceiling below a shower. Those suggest the problem is behind the tile, not in the joint, and surface re-grouting would only dress it up briefly. A small, isolated crack in otherwise solid tile, though, is exactly the repair to keep for yourself.
Quick recap
- Corners and changes of plane get caulk, never grout — the rule behind most cracks.
- Remove damaged grout to at least two-thirds depth; vacuum the joint clean.
- Sanded for wide joints, unsanded for narrow; mix to peanut-butter thickness.
- Pack it in with the float at 45 degrees, scrape diagonally.
- Wipe on the bag’s schedule, buff the haze the same day.
- Cure fully, then seal. That is the whole craft.
As an Amazon Associate, we earn from qualifying purchases.